
Krea 2: Unsencored Text-to-Image Generations in ComfyUI
Krea 2: Unsencored Text-to-Image Generations in ComfyUI
1. Introduction
Krea 2 Turbo is an advanced text-to-image generation model built on a Diffusion Transformer architecture with 12 billion parameters, optimized for both speed and high-quality output. In this guide, we focus specifically on the Turbo variant, which is designed to generate detailed images in as few as 12 steps, making it significantly faster than traditional diffusion workflows.
One of the key advantages of Krea 2 Turbo is its natural language prompting. Unlike models that rely on structured JSON inputs, you can simply describe your idea in plain text and achieve strong, consistent results. This makes the workflow more intuitive and accessible, while still delivering high-end visual quality.
As an open-weight model, Krea 2 Turbo allows for flexible local use. In this tutorial, the workflow is configured to run uncensored, enabled by the additional custom node ComfyUI-ConditioningKrea2Rebalance, which removes default conditioning constraints and gives you full control over generation behavior.
In this tutorial, we’ll walk through how to set up and use Krea 2 Turbo in ComfyUI, so you can take full advantage of its speed, quality, and creative freedom.
⚠️ Important: This tool should be used responsibly. It is the user’s responsibility to ensure ethical and legal use of the model.
Krea 2: Uncensored Text-to-Image
Run Krea 2 inside The Hub and generate stunning AI images
2. Requirements & Setup for Krea 2 (ComfyUI)
Before running Krea 2 in ComfyUI, make sure your environment is properly configured. Start by installing ComfyUI and updating it to the latest version to ensure compatibility with the latest workflows and custom nodes.
Krea 2 Turbo is a high-performance model optimized for fast inference, capable of generating high-quality images in as few as 12 steps. While it is more efficient than many other large models, a GPU with at least 8 GB VRAM is recommended for smooth performance. For higher resolutions (e.g., 2K), more VRAM is beneficial.
Requirement 1: ComfyUI Installed
You'll need ComfyUI running either locally or on a cloud GPU.
Local (Windows): 👉 How to Install ComfyUI Locally on Windows
Cloud GPU (RunPod): 👉 How to Run ComfyUI on RunPod with Network Volume
Requirement 2: Update ComfyUI
Keeping ComfyUI updated ensures compatibility with the latest workflows and nodes.
Windows Portable Users:
Best version
Navigate to: ...\ComfyUI_windows_portable\update
Then run: update_comfyui.bat
RunPod / Linux Users:
1
2cd /workspace/ComfyUI && git pull origin master && pip install -r requirements.txt && cd /workspace
1
2cd /workspace/ComfyUI && git pull origin master && pip install -r requirements.txt && cd /workspaceAlternatively, update directly via the Custom Node Manager inside ComfyUI.
Requirement 3: Install Required Custom Node
If any actual required nodes are missing (not just unused loaders):
- Open Manager in ComfyUI
- Click Install Missing Custom Nodes
- Install everything shown
- Restart ComfyUI
Open Manager in ComfyUI
Click Install Missing Custom Nodes
Install everything shown
Restart ComfyUI
After restart, reload the workflow — all required nodes should be active.
Requirement 4: Download Krea 2 Model Files & LoRA
Krea 2 Turbo requires the Turbo diffusion model, along with a Qwen text encoder and a Qwen VAE.
| e Name | Download Page | File Directory |
|---|---|---|
| krea2_turbo_fp8_scaled.safetensors | 🤗 Download Page | ..\ComfyUI\models\diffusion_models |
| qwen3vl_4b_fp8_scaled.safetensors | 🤗 Download Page | ..\ComfyUI\models\text_encoders |
| qwen_image_vae.safetensors | 🤗 Download Page | ..\ComfyUI\models\vae |
| MysticXXX_KREA2_v1.safetensors | 👉 Download Page | ..\ComfyUI\models\loras |
Notes
- The Krea 2 Turbo diffusion model is optimized for fast generation (12 steps)
- Typical settings use CFG = 0.0-1.0 for best results
- Higher resolutions (e.g., 1024–2048) may require more VRAM (24-32)
- The custom node enables less restricted / uncensored outputs, giving you more control over generation
The Krea 2 Turbo diffusion model is optimized for fast generation (12 steps)
Typical settings use CFG = 0.0-1.0 for best results
Higher resolutions (e.g., 1024–2048) may require more VRAM (24-32)
The custom node enables less restricted / uncensored outputs, giving you more control over generation
Requirement 5: Verify Folder Structure
Ensure your files are placed correctly before launching ComfyUI:
1📂 ComfyUI/
2├── 📂 models/
3│   ├── 📂 diffusion_models/
4│   │   └── krea2_turbo_fp8_scaled.safetensors
5│   ├── 📂 text_encoders/
6│   │   └── qwen3vl_4b_fp8_scaled.safetensors
7│   ├── 📂 vae/
8│   │   └── qwen_image_vae.safetensors
9│   ├── 📂 loras/
10│   │   └── MysticXXX_KREA2_v1.safetensors
1📂 ComfyUI/
2├── 📂 models/
3│ ├── 📂 diffusion_models/
4│ │ └── krea2_turbo_fp8_scaled.safetensors
5│ ├── 📂 text_encoders/
6│ │ └── qwen3vl_4b_fp8_scaled.safetensors
7│ ├── 📂 vae/
8│ │ └── qwen_image_vae.safetensors
9│ ├── 📂 loras/
10│ │ └── MysticXXX_KREA2_v1.safetensorsNotes
- Make sure filenames match exactly
- Refresh ComfyUI after models are downloaded
- If models are not detected, verify folder placement and reload
Make sure filenames match exactly
Refresh ComfyUI after models are downloaded
If models are not detected, verify folder placement and reload
3. Downloading and Loading the Krea 2 Workflow
Once your environment is fully set up and all required models are installed, the next step is to download and load the Krea 2 Turbo workflow JSON (Unsencored) into ComfyUI. This workflow contains all node configurations needed to run Krea 2 Turbo correctly.
Step 1: Download the Workflow
👉 Download Krea 2 Turbo 12 step Workflow JSON
Start by downloading the Krea 2 workflow file in .json format. It contains all required nodes, model references, and inference settings needed for proper generation.
Step 2: Load the Workflow in ComfyUI
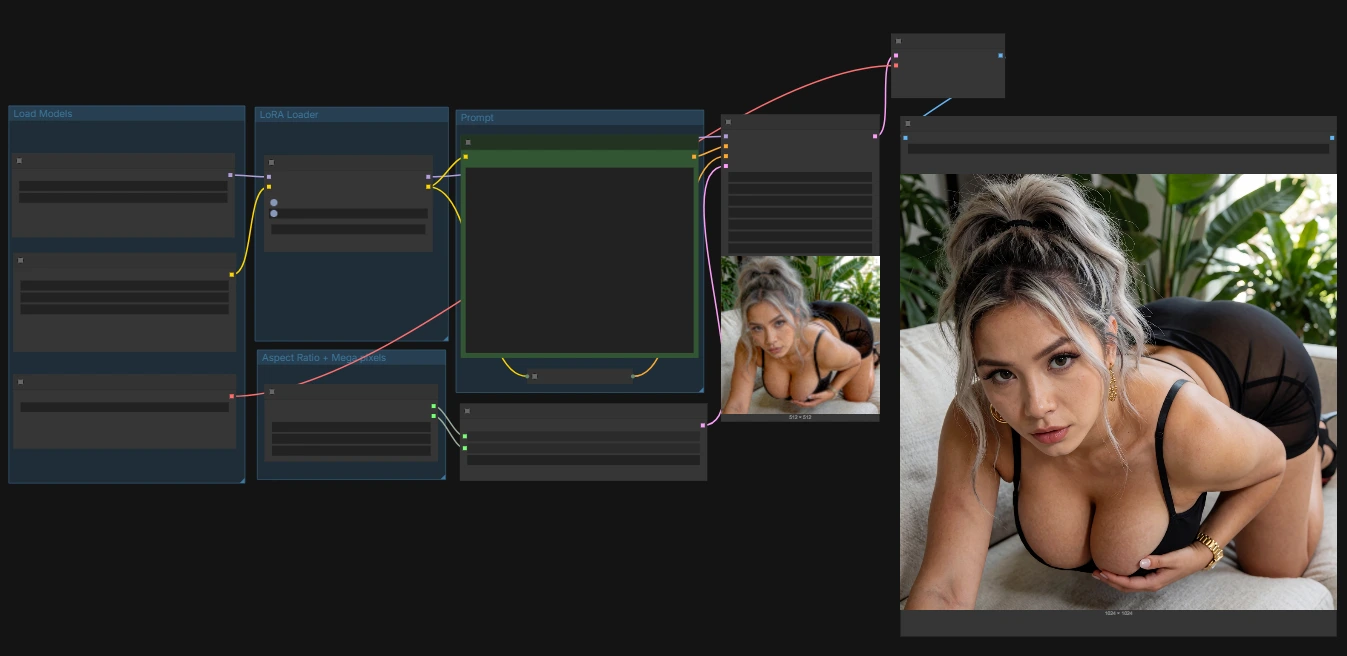
After downloading the file, open ComfyUI and simply drag and drop the .json workflow into the interface; it will automatically load with all nodes correctly arranged and connected.
Step 3: Verify Model Assignments
Once loaded, check that all required models are correctly assigned within the workflow:
- Diffusion Model (Checkpoint): krea2_turbo_fp8_scaled.safetensors
- Text Encoder: qwen3vl_4b_fp8_scaled.safetensors
- VAE: qwen_image_vae.safetensors
- LoRa: MysticXXX_KREA2_v1.safetensors
Diffusion Model (Checkpoint): krea2_turbo_fp8_scaled.safetensors
Text Encoder: qwen3vl_4b_fp8_scaled.safetensors
VAE: qwen_image_vae.safetensors
LoRa: MysticXXX_KREA2_v1.safetensors
After verifying that all models are correctly assigned, the workflow is ready to use. In the next section, we’ll configure the settings and begin generating images.
Krea 2: Uncensored Text-to-Image
Run Krea 2 inside The Hub and generate stunning AI images
4. Configuring the Workflow Settings
With the Krea 2 workflow successfully loaded into ComfyUI, the next step is to configure the settings for image generation. Krea 2 is designed for natural language prompting, meaning you can simply describe what you want, and the model will interpret it directly without requiring structured JSON.
Key Parameters
| Parameter | Setting | Description |
|---|---|---|
| Steps | 12 | Fixed for the Krea 2 Turbo diffusion model. Optimized for fast, high-quality generation. |
| CFG (Classifier-Free Guidance) | 1.0 | Balanced setting that maintains prompt adherence while preserving creative flexibility. |
| Resolution | Up to 2K | Supports both standard and high-resolution outputs depending on your use case. |
One of the main advantages of Krea 2 is its simplicity—unlike models such as Ideogram, it does not require structured JSON prompting, making the workflow more fluid and intuitive. You can optionally refine outputs by adjusting style, realism, and composition depending on your creative direction.
5. Example Generations with Krea 2 Turbo (Unsencored)
Now that you have configured the Krea 2 workflow, it’s time to see the model in action through example generations. The beauty of Krea 2 lies in its ability to produce high-quality outputs from simple prompts.
Below, we showcase some beautiful examples. Keep in mind that we cannot display fully unrestricted outputs here, but the model is fully capable of generating them when used locally or within The Hub.
I’ve done my best to generate some stunning examples for you. As you can see, details like hands, fingers, and even feet are rendered with impressive accuracy. 👇

Krea 2: Uncensored Text-to-Image
Run Krea 2 inside The Hub and generate stunning AI images
6. Conclusion
Krea 2 Turbo integrates powerful diffusion transformer technology with a streamlined, natural-language workflow inside ComfyUI, making it a strong option for fast, high-quality text-to-image generation. With its optimized 12-step inference process and Qwen-based components, it delivers a balance of speed, detail, and flexibility that’s well-suited for both experimentation and production use.
The setup process is straightforward once all dependencies are in place: installing the required models, adding the custom node, and loading the workflow JSON. After that, generation becomes largely about prompt design rather than complex configuration, which significantly lowers the barrier for creative iteration.
Overall, Krea 2 Turbo stands out for four key reasons: efficiency, ease of use, output quality and freedom. Whether you’re exploring artistic concepts, building visual prototypes, or testing prompt ideas, it provides a responsive and capable environment for rapid image generation—especially when paired with a properly configured and updated ComfyUI setup.
Frequently Asked Questions
Is Krea 2 Turbo really uncensored when used in ComfyUI?
What are the ideal settings for Krea 2 Turbo?
What are the required VRAM specifications for Krea 2 Turbo?
Enjoyed this article? Share it with your network.