
AI Clothing Swap with FLUX 2.0 Klein 9B in ComfyUI
AI Clothing Swap with FLUX 2.0 Klein 9B in ComfyUI
1. Introduction
AI-powered clothing swap and virtual try-on have become some of the most sought-after capabilities in generative image workflows. The AI Clothing Swap with FLUX 2.0 Klein 9B in ComfyUI tutorial shows you how to transfer an outfit from one reference image onto a person in a second image — all with a single workflow run. By leveraging the powerful instruction-following and identity-preservation capabilities of the FLUX Klein 9B image edit model, you can achieve realistic, high-fidelity outfit transfers without complex masking or inpainting pipelines.
This approach is ideal for a wide range of use cases: virtual try-on for e-commerce, generating clothing LoRA training datasets, fashion concept visualization, or simply exploring creative outfit combinations. Whether you are a fashion brand looking to scale product photography, a machine learning practitioner building clothing datasets, or a creative experimenter, this guide will walk you through the complete setup and execution from start to finish.
Uncensored Image Editing
Get Started with Uncensored Image Editing in THE HUB
2. Requirements & Setup for FLUX 2.0 Klein 9B Image Edit Model
Before running the clothing swap workflow in ComfyUI, make sure your environment is correctly configured. Start by installing ComfyUI and updating it to the latest version to ensure full compatibility with current nodes and models.
The FLUX 2.0 Klein 9B model is VRAM-intensive. A high-memory GPU is strongly recommended. Cloud platforms like RunPod are a practical alternative if your local hardware is limited.
Requirement 1: ComfyUI Installed
You'll need ComfyUI running either locally or on a cloud GPU.
Local (Windows): 👉 How to Install ComfyUI Locally on Windows
Cloud GPU (Runpod): 👉 How to Run ComfyUI on RunPod with Network Volume
Requirement 2: Update ComfyUI
Keeping ComfyUI updated ensures full compatibility with the latest features and workflows.
Windows Portable Users:
- Navigate to: ...\ComfyUI_windows_portable\update
- Run: update_comfyui.bat
Navigate to: ...\ComfyUI_windows_portable\update
Run: update_comfyui.bat
RunPod / Linux Users:
1 cd /workspace/ComfyUI && git pull origin master && pip install -r requirements.txt && cd /workspace1 cd /workspace/ComfyUI && git pull origin master && pip install -r requirements.txt && cd /workspaceAlternatively, update directly through the Custom Node Manager in ComfyUI.
Requirement 3: Download FLUX 2.0 9B Klein Model Files
The 9B model generates or edits images in just 4 steps, delivering fast and high-quality results. It requires significantly more VRAM than 4B models, with 24GB+ recommended. It is best suited for high-fidelity image edits like clothing swaps, where fine details in fabric, texture, and fit must be preserved.
| File Name | Download Page | File Directory |
|---|---|---|
| flux-2-klein-9b-fp8.safetensors | 🤗 Download Page | ..\ComfyUI\models\diffusion_models |
| qwen_3_8b_fp8mixed.safetensors | 🤗 Download Page | ..\ComfyUI\models\text_encoders |
| flux2-vae.safetensors | 🤗 Download Page | ..\ComfyUI\models\vae |
💡 Note: If you're using RunPod CLI, make sure to create a HuggingFace access token to download the 9B model file.
Requirement 4: HuggingFace Access Token (FLUX 2.0 [klein] 9B Model)
The FLUX 2.0 [klein] 9B models are distributed under a non-commercial license, which means you'll need authenticated access via HuggingFace to download them.
Create a HuggingFace Access Token
To download the 9B model files, generate an access token:
- Go to your HuggingFace account → Access Tokens
- Click Create New Token and give it a name
- Under Repositories permissions, add: black-forest-labs/FLUX.2-klein-9b-fp8 (9B Distilled)
- Click Create Token
Go to your HuggingFace account → Access Tokens
Click Create New Token and give it a name
Under Repositories permissions, add: black-forest-labs/FLUX.2-klein-9b-fp8 (9B Distilled)
Click Create Token
Download the Model Using Your Token
Once created, you can securely download the model using your token. Example:
1 wget -4 --header="Authorization: Bearer HF_TOKEN_HERE" https://huggingface.co/black-forest-labs/FLUX.2-klein-9b-fp8/resolve/main/flux-2-klein-9b-fp8.safetensors1 wget -4 --header="Authorization: Bearer HF_TOKEN_HERE" https://huggingface.co/black-forest-labs/FLUX.2-klein-9b-fp8/resolve/main/flux-2-klein-9b-fp8.safetensorsReplace HF_TOKEN_HERE with your actual HuggingFace token. This ensures you have proper access and can download the files directly into your cloud environment (e.g., RunPod).
3. Downloading and Loading the Clothing Swap Workflow (Flux 2.0 Klein 9B edit)
Once your environment is set up, the next step is to download and load the Clothing Swap Workflow into ComfyUI. This process is straightforward and can be completed in just a few steps:
Step 1: Download the Workflow
👉 Download Clothing Swap Workflow
Begin by downloading the clothing swap workflow file in .json format. This file contains all the necessary node configurations, model references, and prompt settings required to perform AI outfit transfer with a single run.
Step 2: Load the Workflow in ComfyUI
After downloading the workflow file, open ComfyUI. Loading is as simple as dragging and dropping the .json file into the ComfyUI interface. The system will automatically recognize the workflow and prepare it for use.
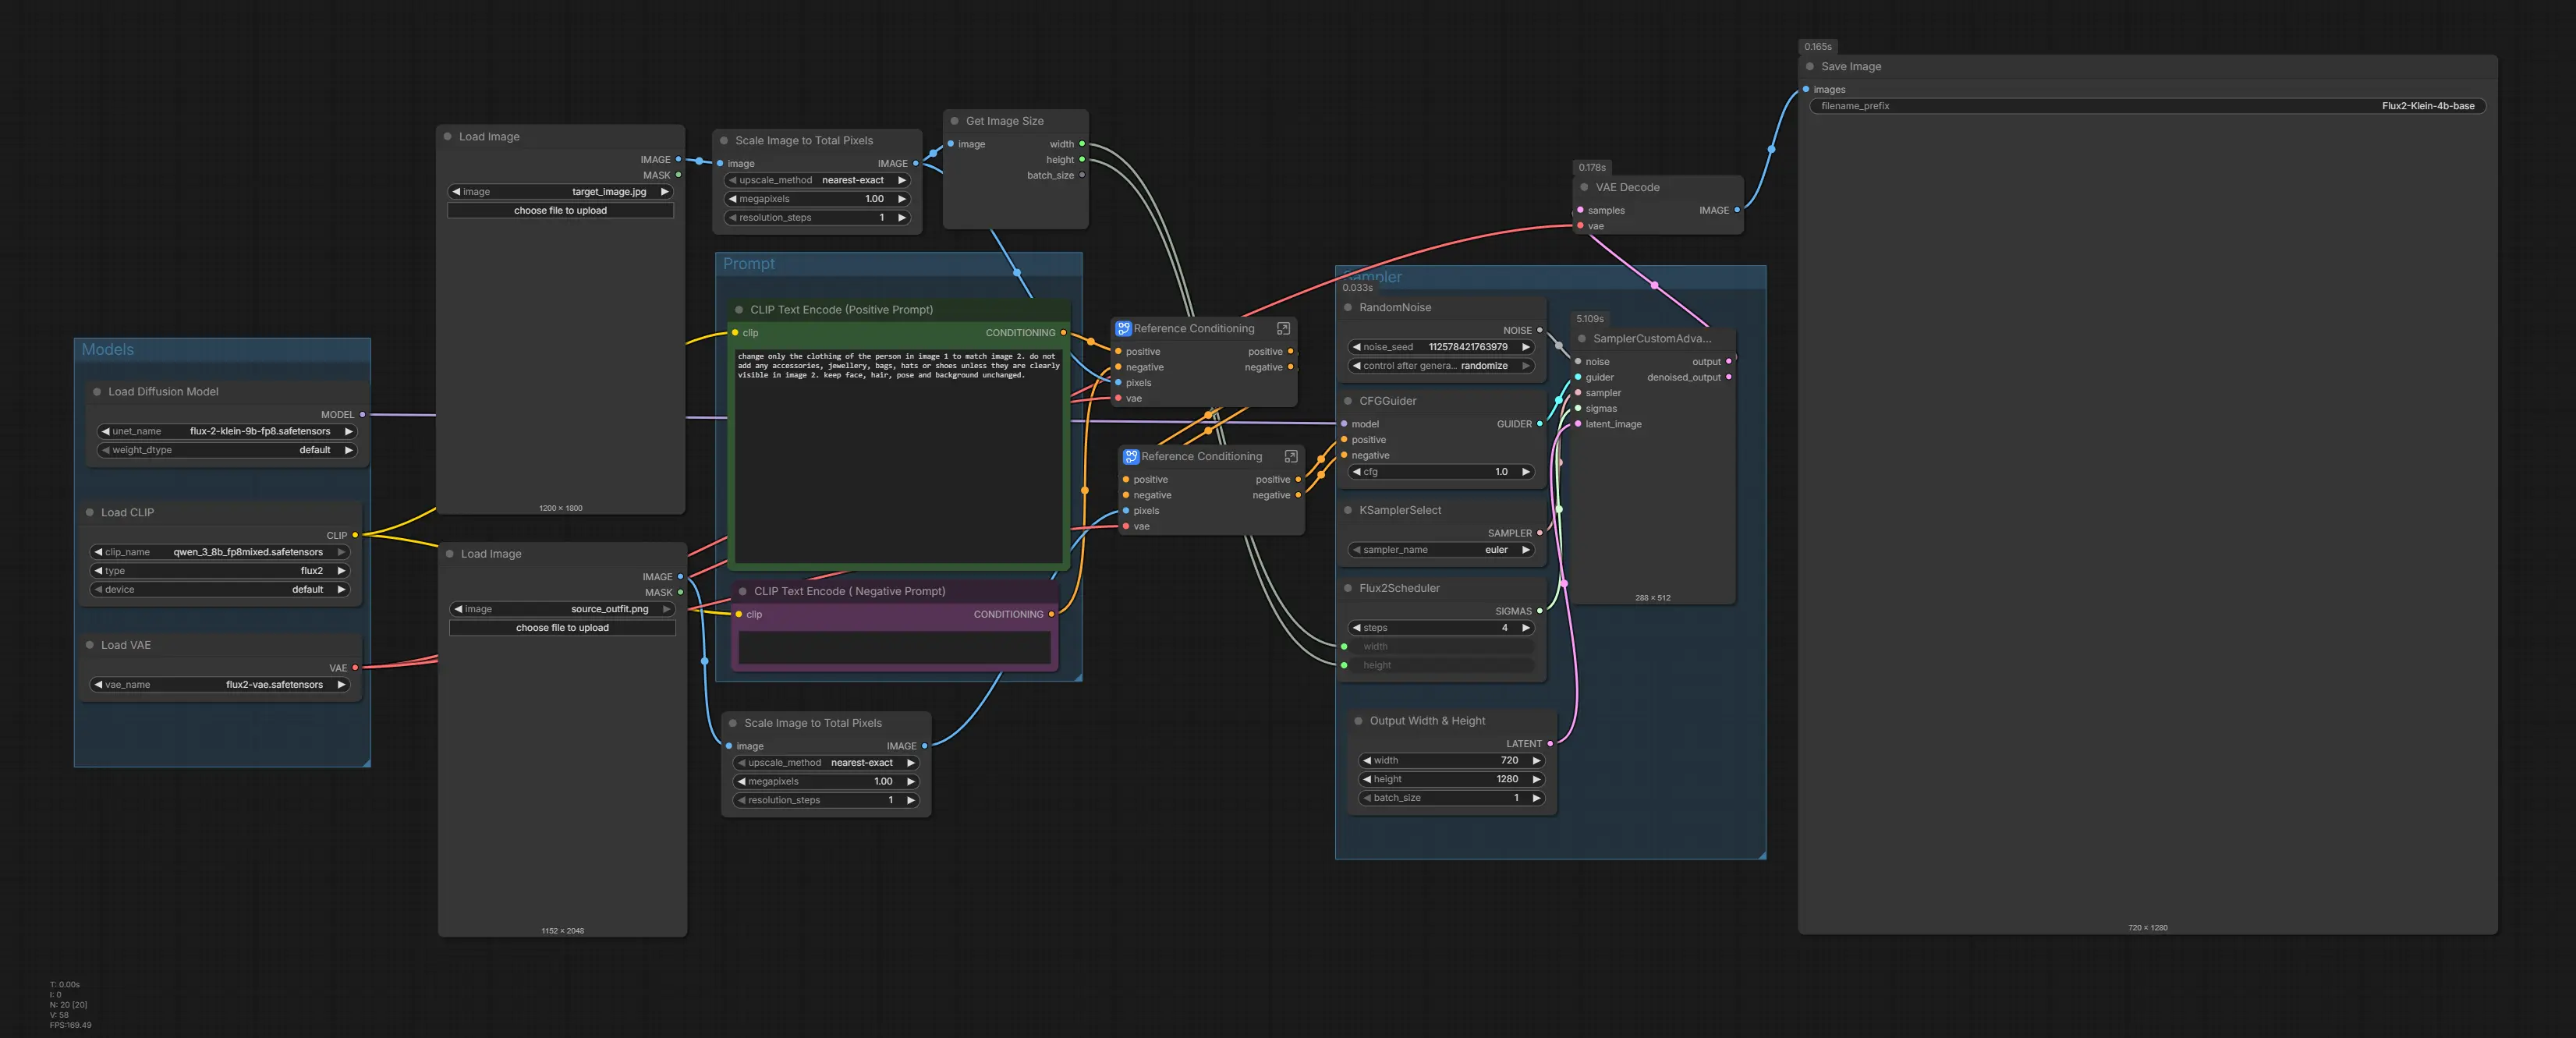
Check for Missing Nodes
If any nodes appear in red after loading the workflow, open the Node Manager in the top-right corner of ComfyUI and click Install Missing Custom Nodes. Select all missing nodes and install them. Once finished, restart ComfyUI when prompted — after reboot, the red nodes should be resolved and your workflow will be ready to use.
Uncensored Image Editing
Get Started with Uncensored Image Editing in THE HUB
4. Configuring the Workflow Settings
The clothing swap workflow uses two input images and a text instruction to guide the model. Here is how to configure each part correctly for optimal results.
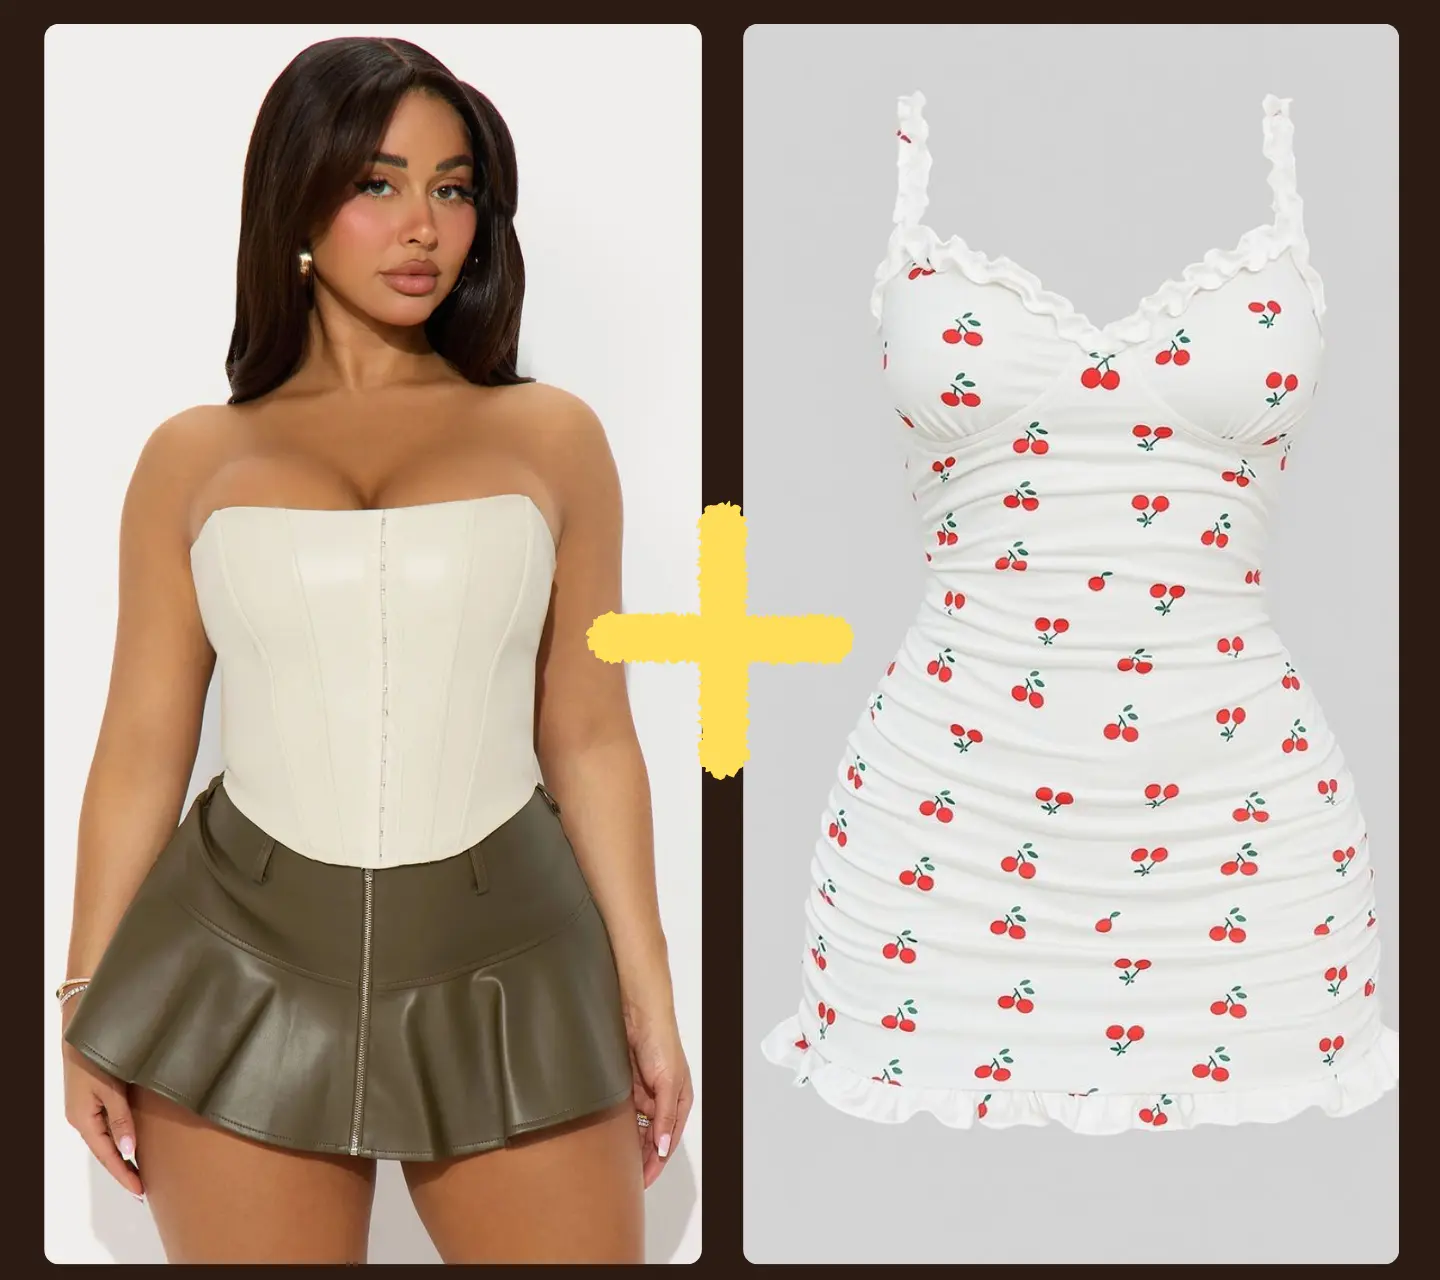
Image 1 — The Person (Target)
Upload your primary reference image into the first Load Image node. This should be a clear photo of the person whose outfit you want to change. A clean background and good lighting will help the model isolate the figure and produce a more accurate swap.
Image 2 — The Outfit Source
Upload your clothing reference image into the second Load Image node. This can be a product photo, a fashion lookbook image, or another person wearing the outfit you want to transfer. The model will extract the style, color, and cut of the garment from this image. A good place to find outfit examples is Pinterest. Below is an example of both input images we will try to combine:
Text Prompt (CLIP Text Encode — Positive)
The workflow includes a CLIP Text Encode (Positive Prompt) node pre-filled with a default instruction:
change only the clothing of the person in image 1 to match image 2. do not add any accessories, jewellery, bags, hats or shoes unless they are clearly visible in image 2. keep face, hair, pose and background unchanged.
change only the clothing of the person in image 1 to match image 2. do not add any accessories, jewellery, bags, hats or shoes unless they are clearly visible in image 2. keep face, hair, pose and background unchanged.
This prompt is optimized to transfer only the garments from Image 2 without the model inventing accessories or details that aren't there. The explicit "do not add" instruction keeps the swap clean and accurate.
Of course, you can extend the prompt to go beyond a simple clothing swap. Some examples:
- change the clothing and make the person smile
- change the clothing and adjust the pose to standing straight
- change the clothing and place the person in a studio background
- change the clothing, remove the hat, and change the hair to blonde
change the clothing and make the person smile
change the clothing and adjust the pose to standing straight
change the clothing and place the person in a studio background
change the clothing, remove the hat, and change the hair to blonde
The model responds well to natural language instructions, so feel free to combine outfit transfer with any other edit you need — expression, pose, background, or hair — all in a single run.
Sampling Steps
Set the sampling steps to 4, as this workflow uses the distilled FLUX.2 Klein 9B model, which is optimized for low-step, high-efficiency generation. This keeps generation fast while maintaining strong visual quality and fidelity to both input images.
Resolution Settings
The workflow includes an Output Width & Height node where you can directly set your desired output resolution. The default is set to 720×1280 (portrait), which works well for full-body clothing swap shots. Simply change the width and height values in that node to match your use case — for example, 1024×1024 for square e-commerce product shots, or 1280×720 for landscape editorial layouts.
Output Example
Below you can see the result of combining the two input images above using the clothing swap workflow.
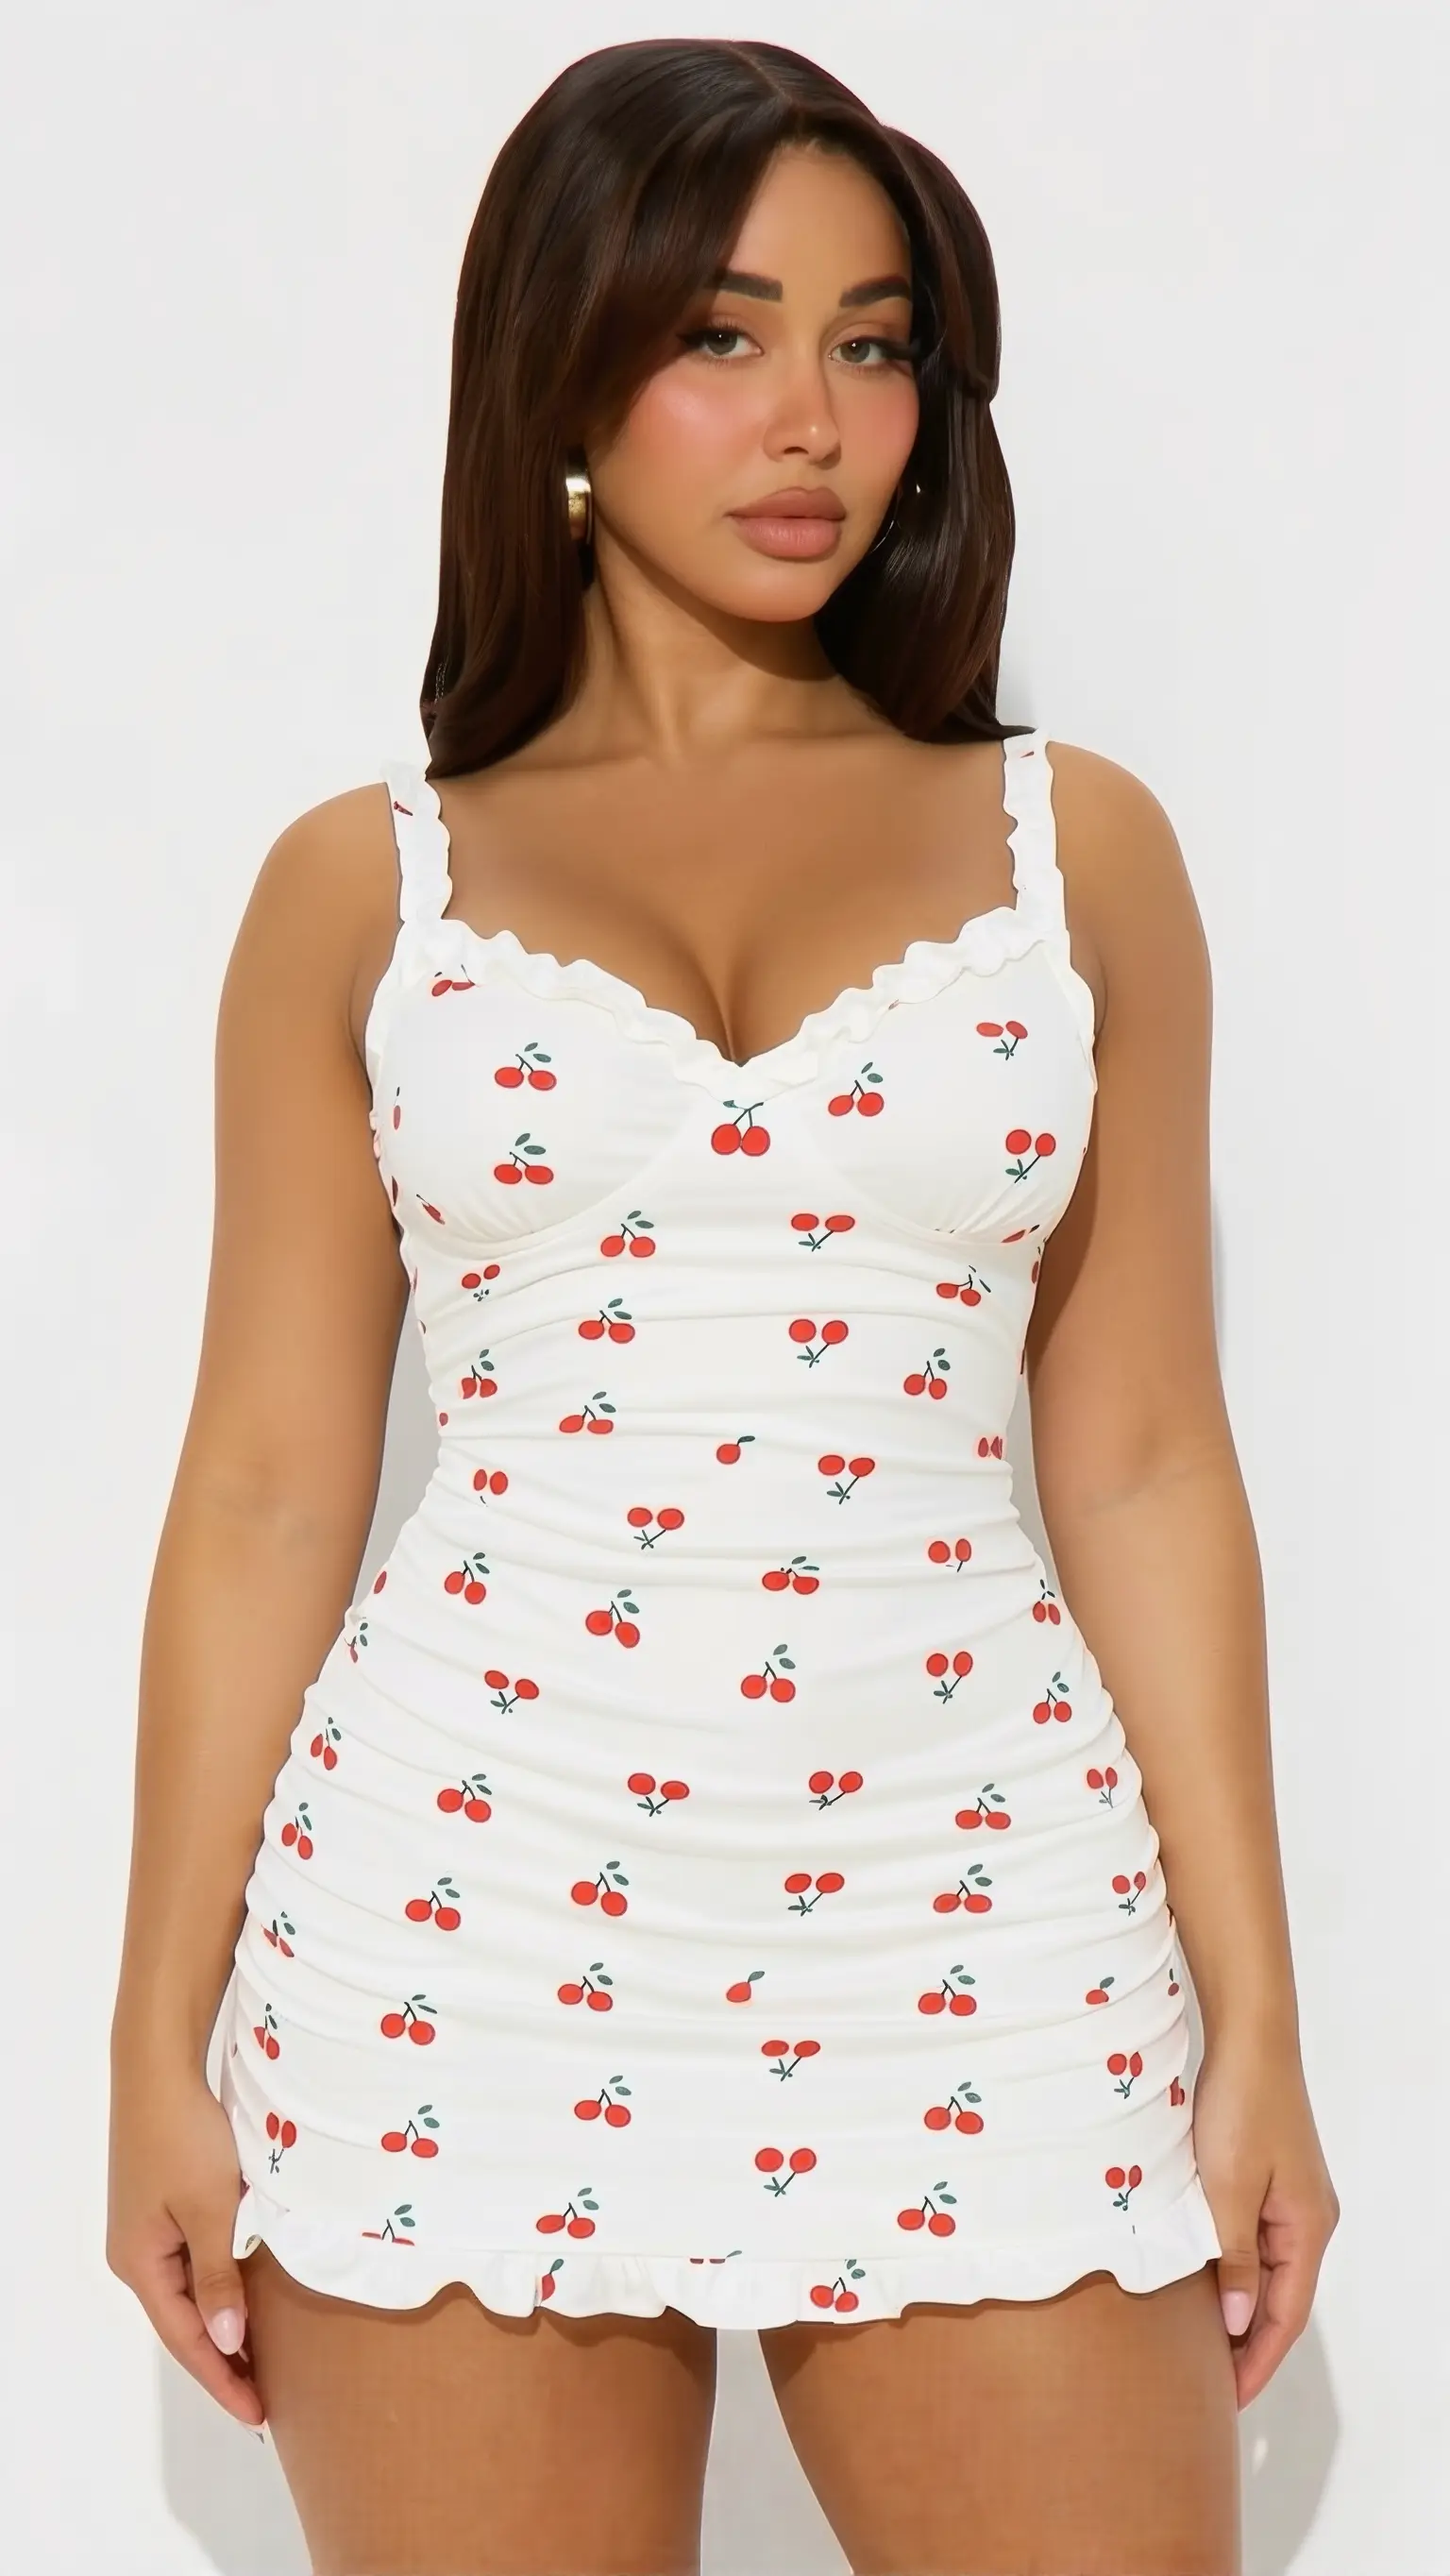
Note that the example above was refined & upscaled using an Image Detailer after the initial swap. If you want to add more detail and sharpness to your output, check out this article: 👉 Z Image Turbo Upscaler and Detailer Workflow in ComfyUI
5. Clothing Swap Example with FLUX.2 Klein 9B Image Edit
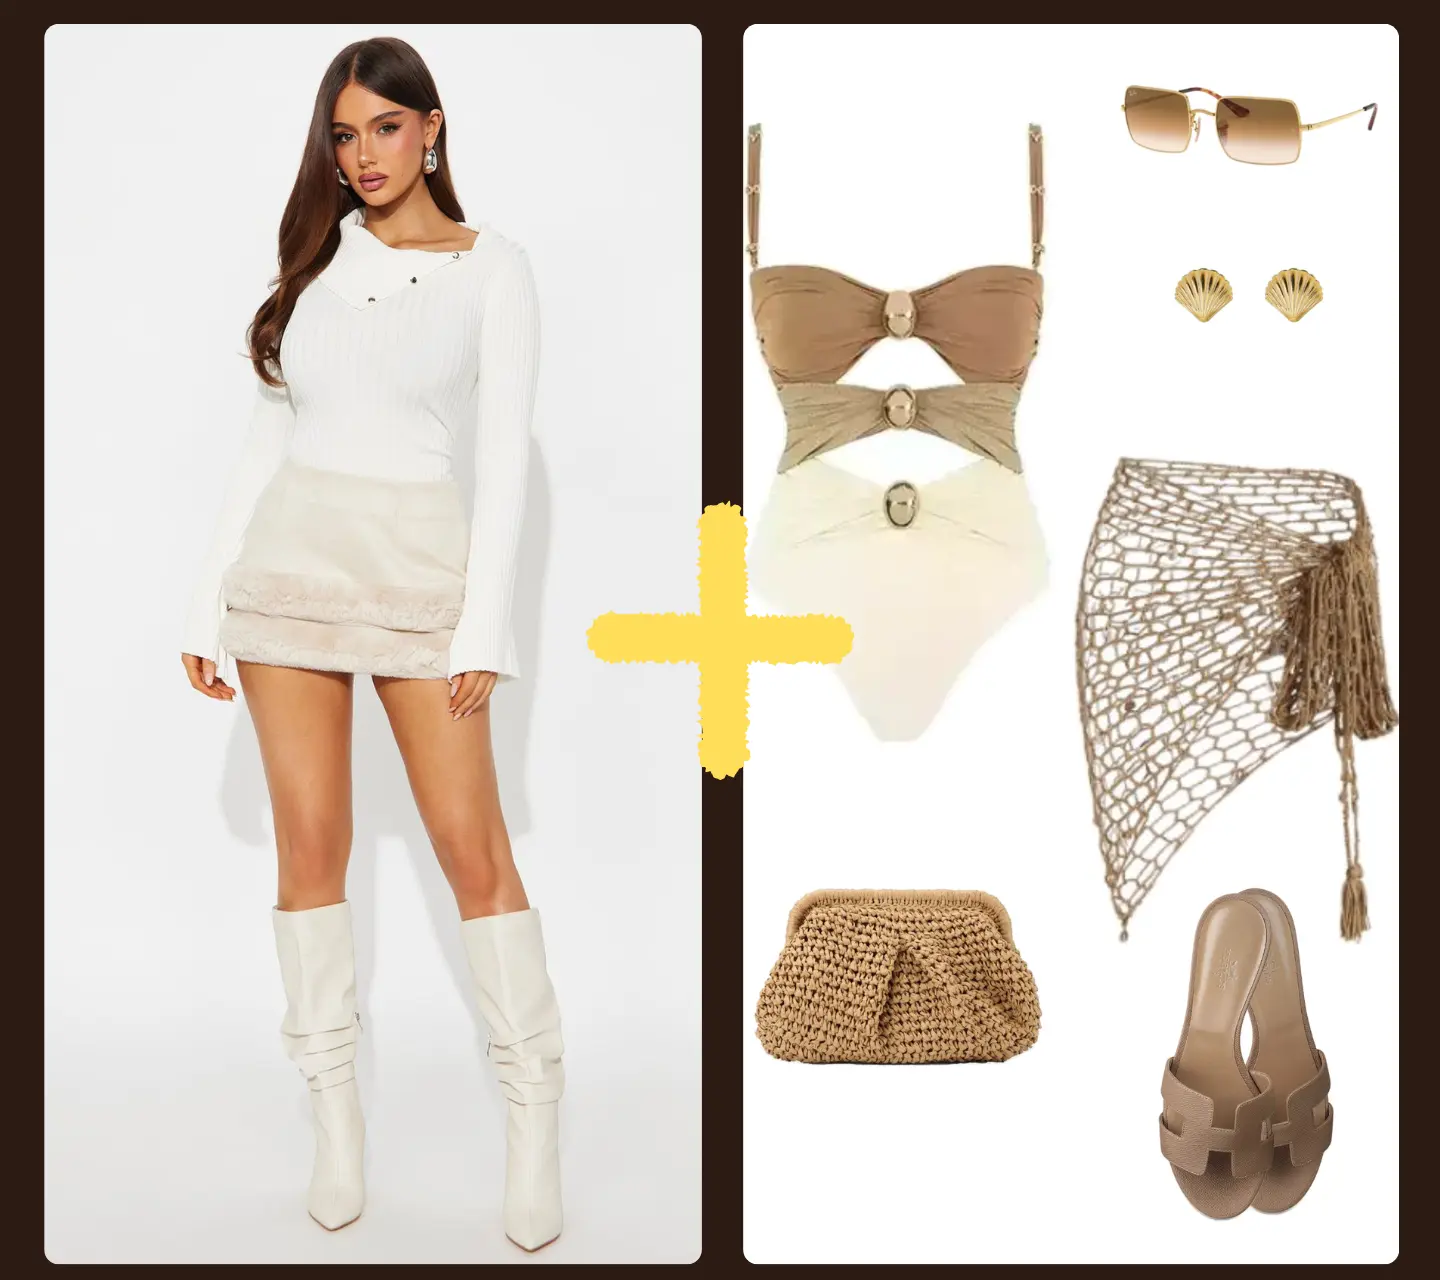
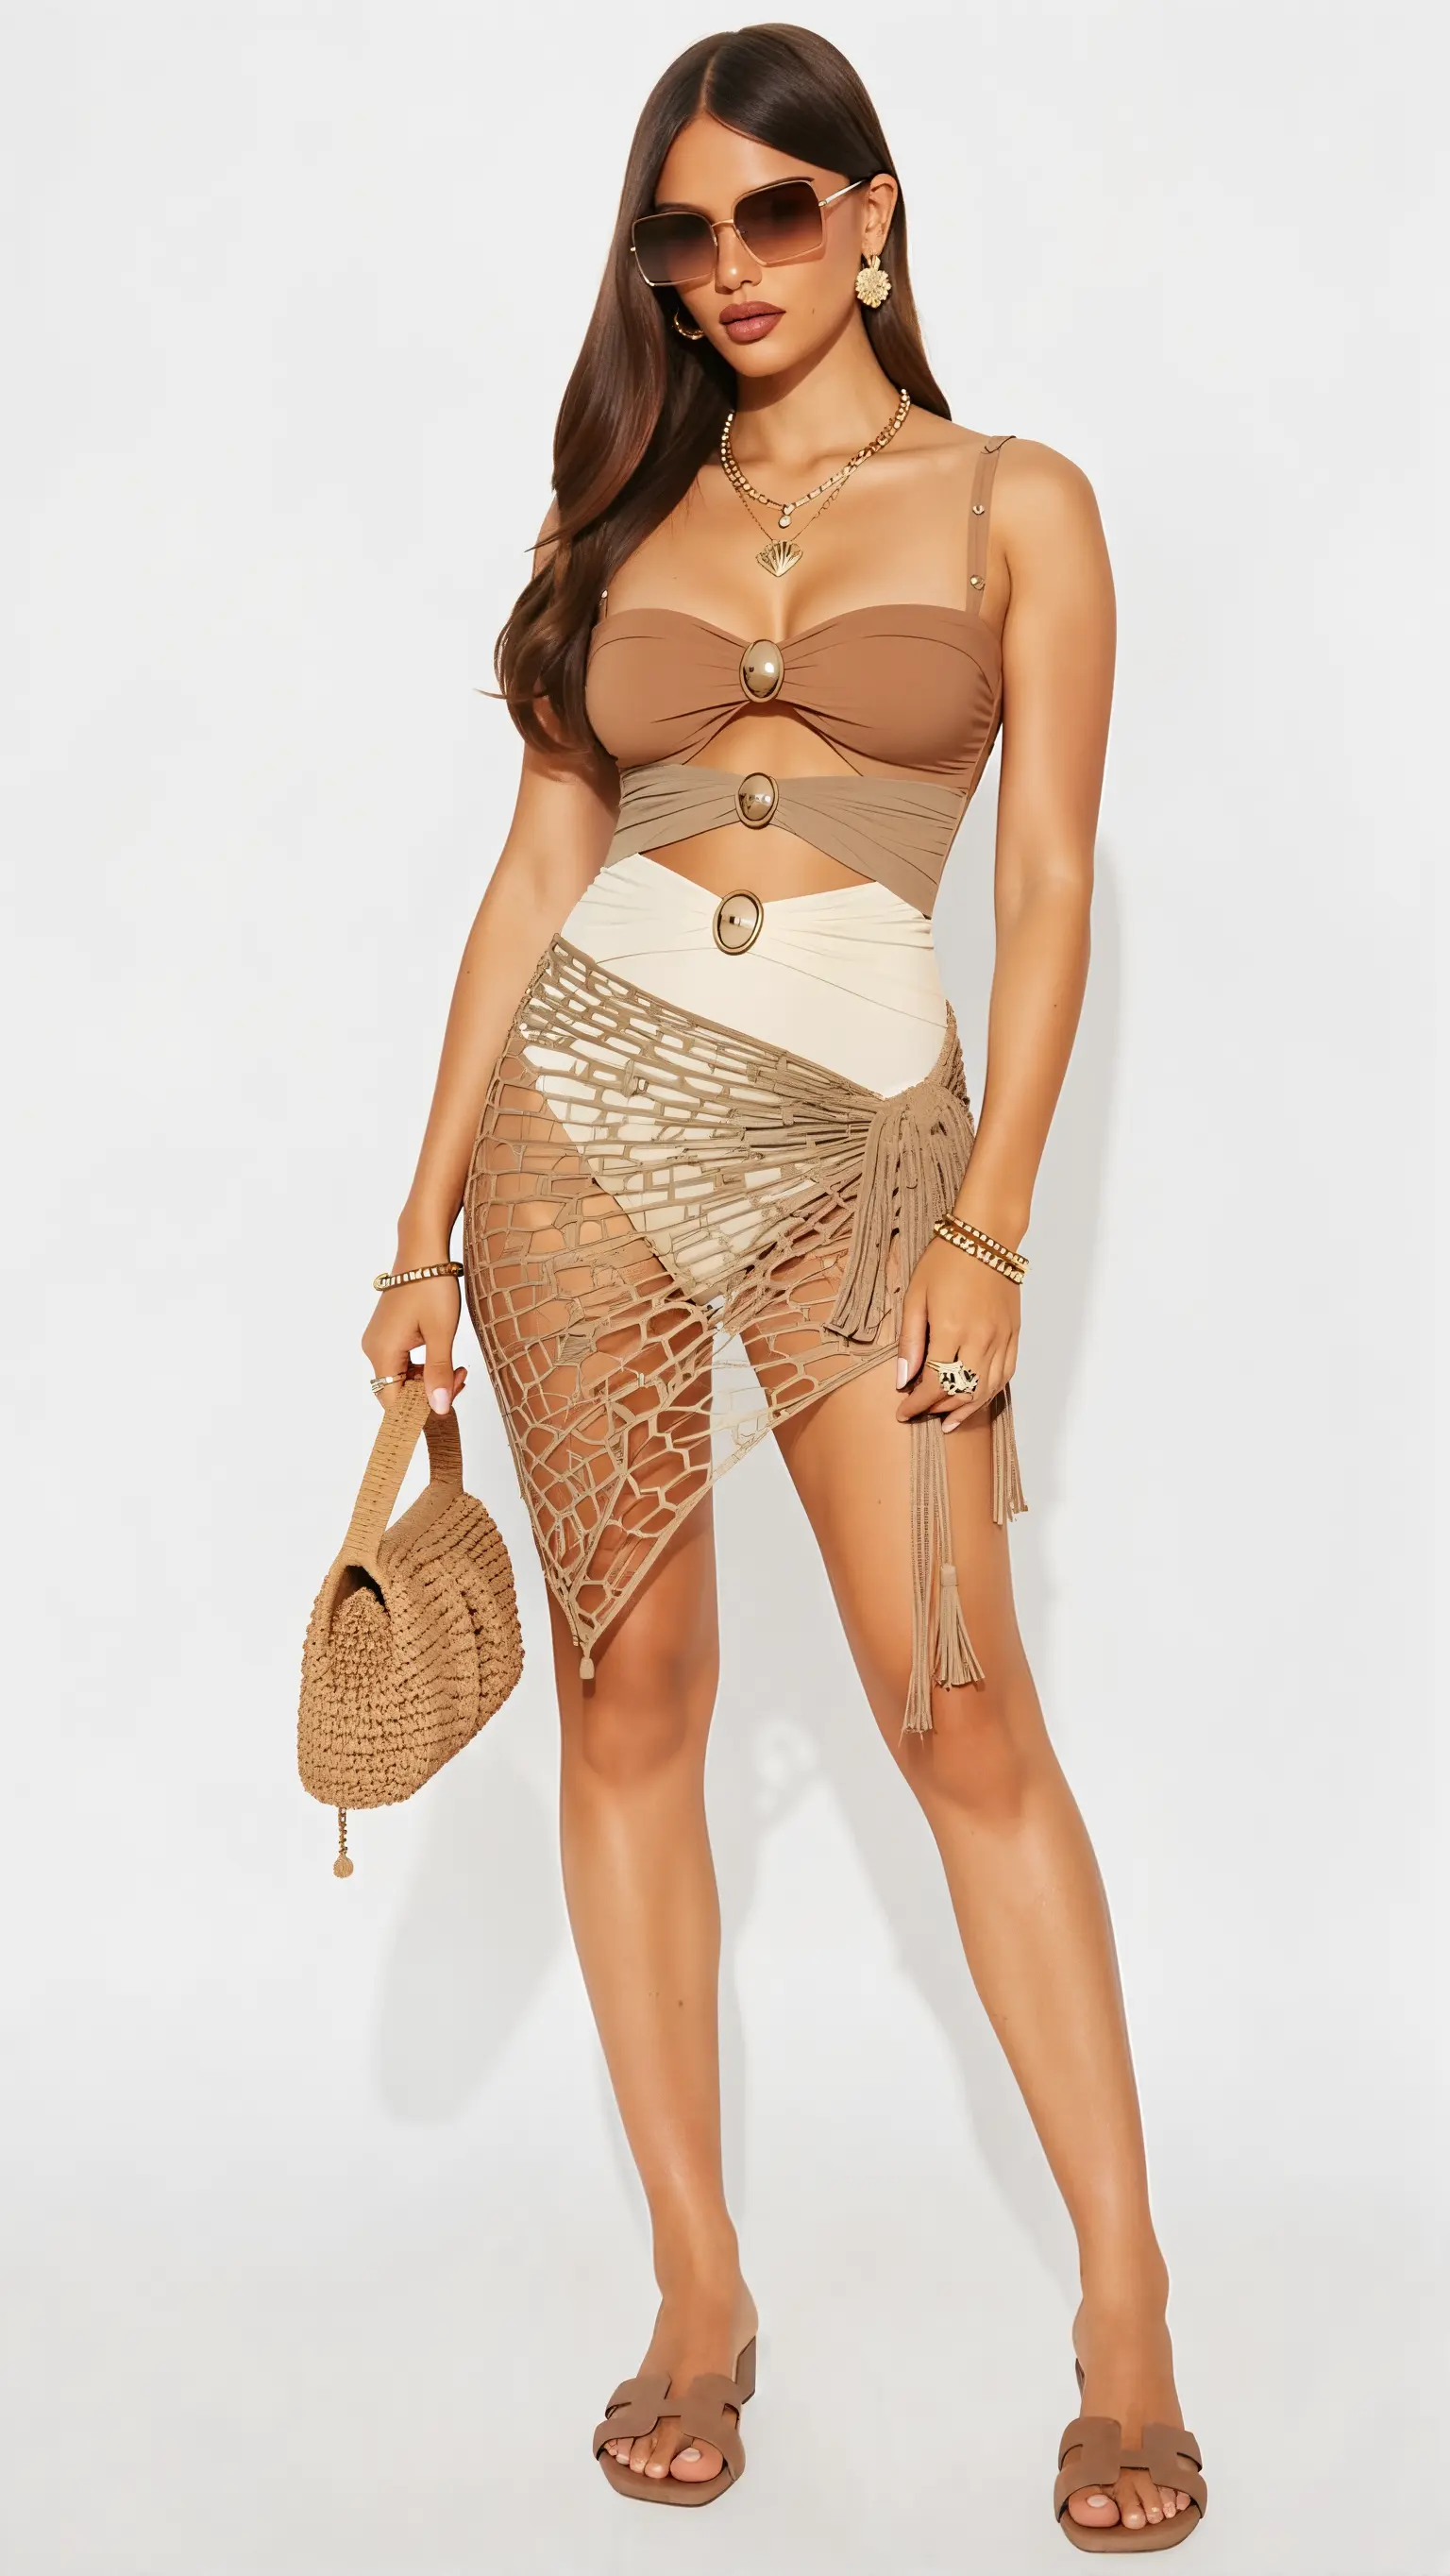
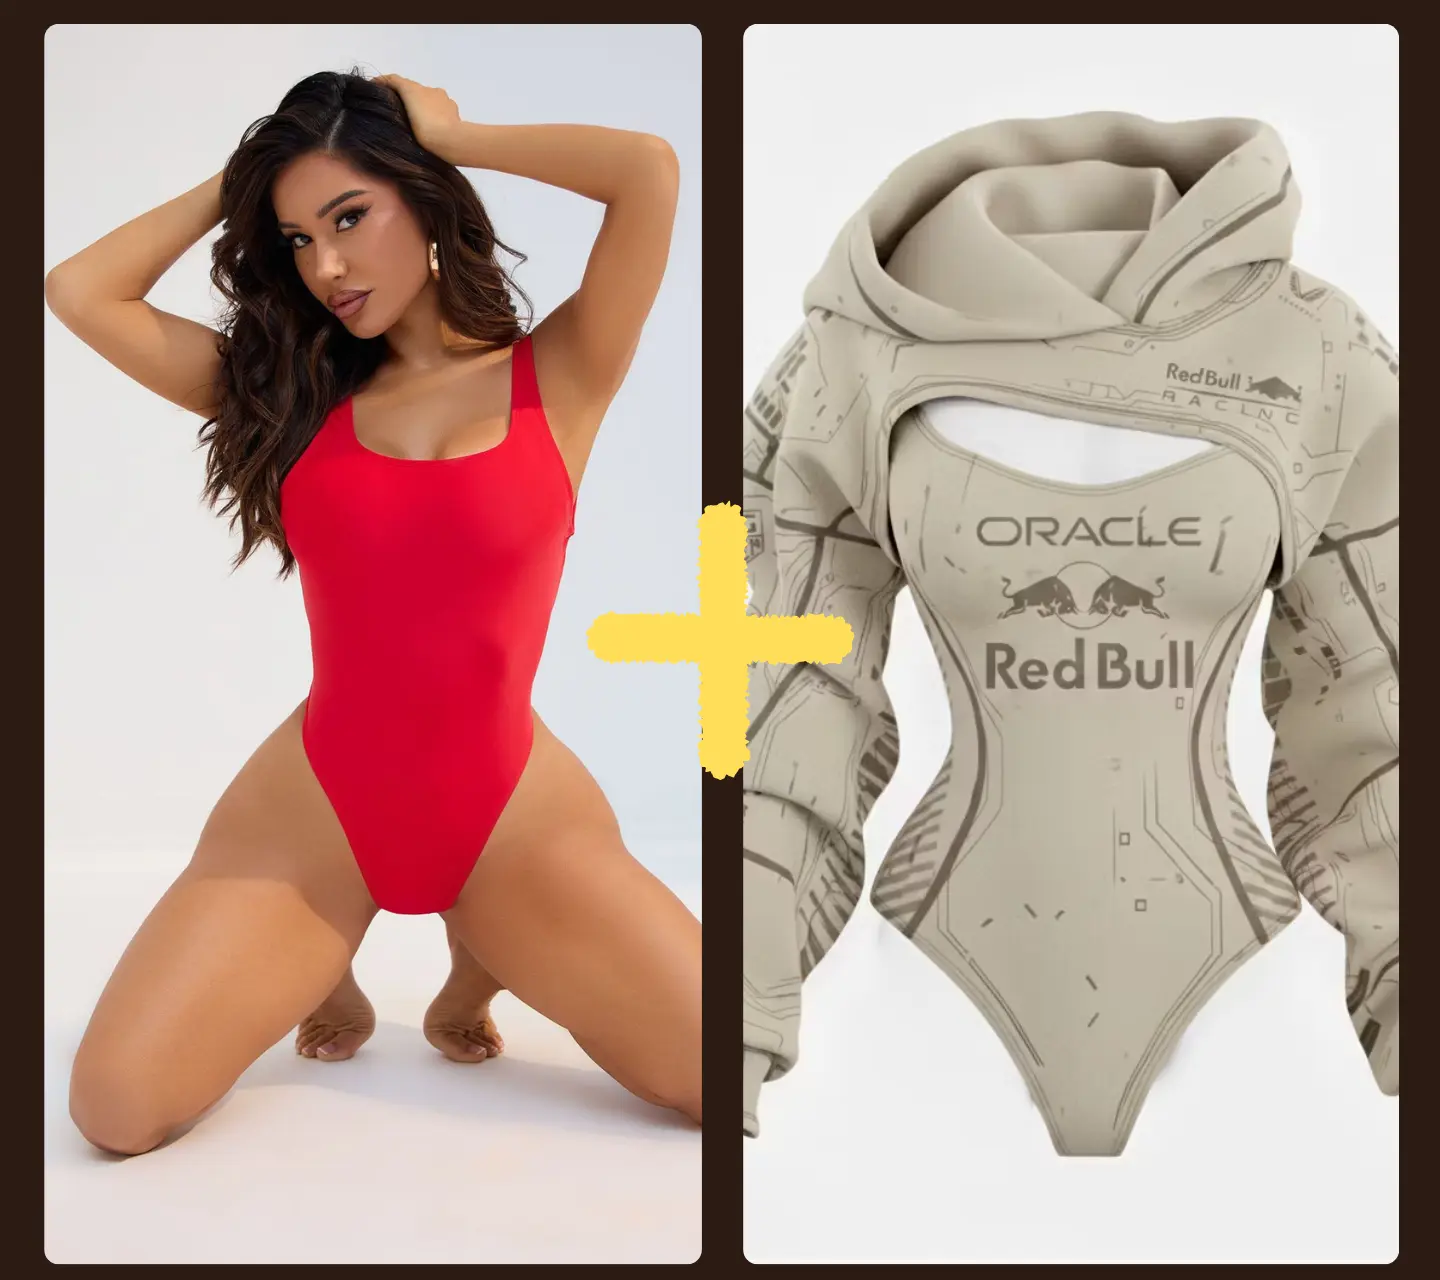
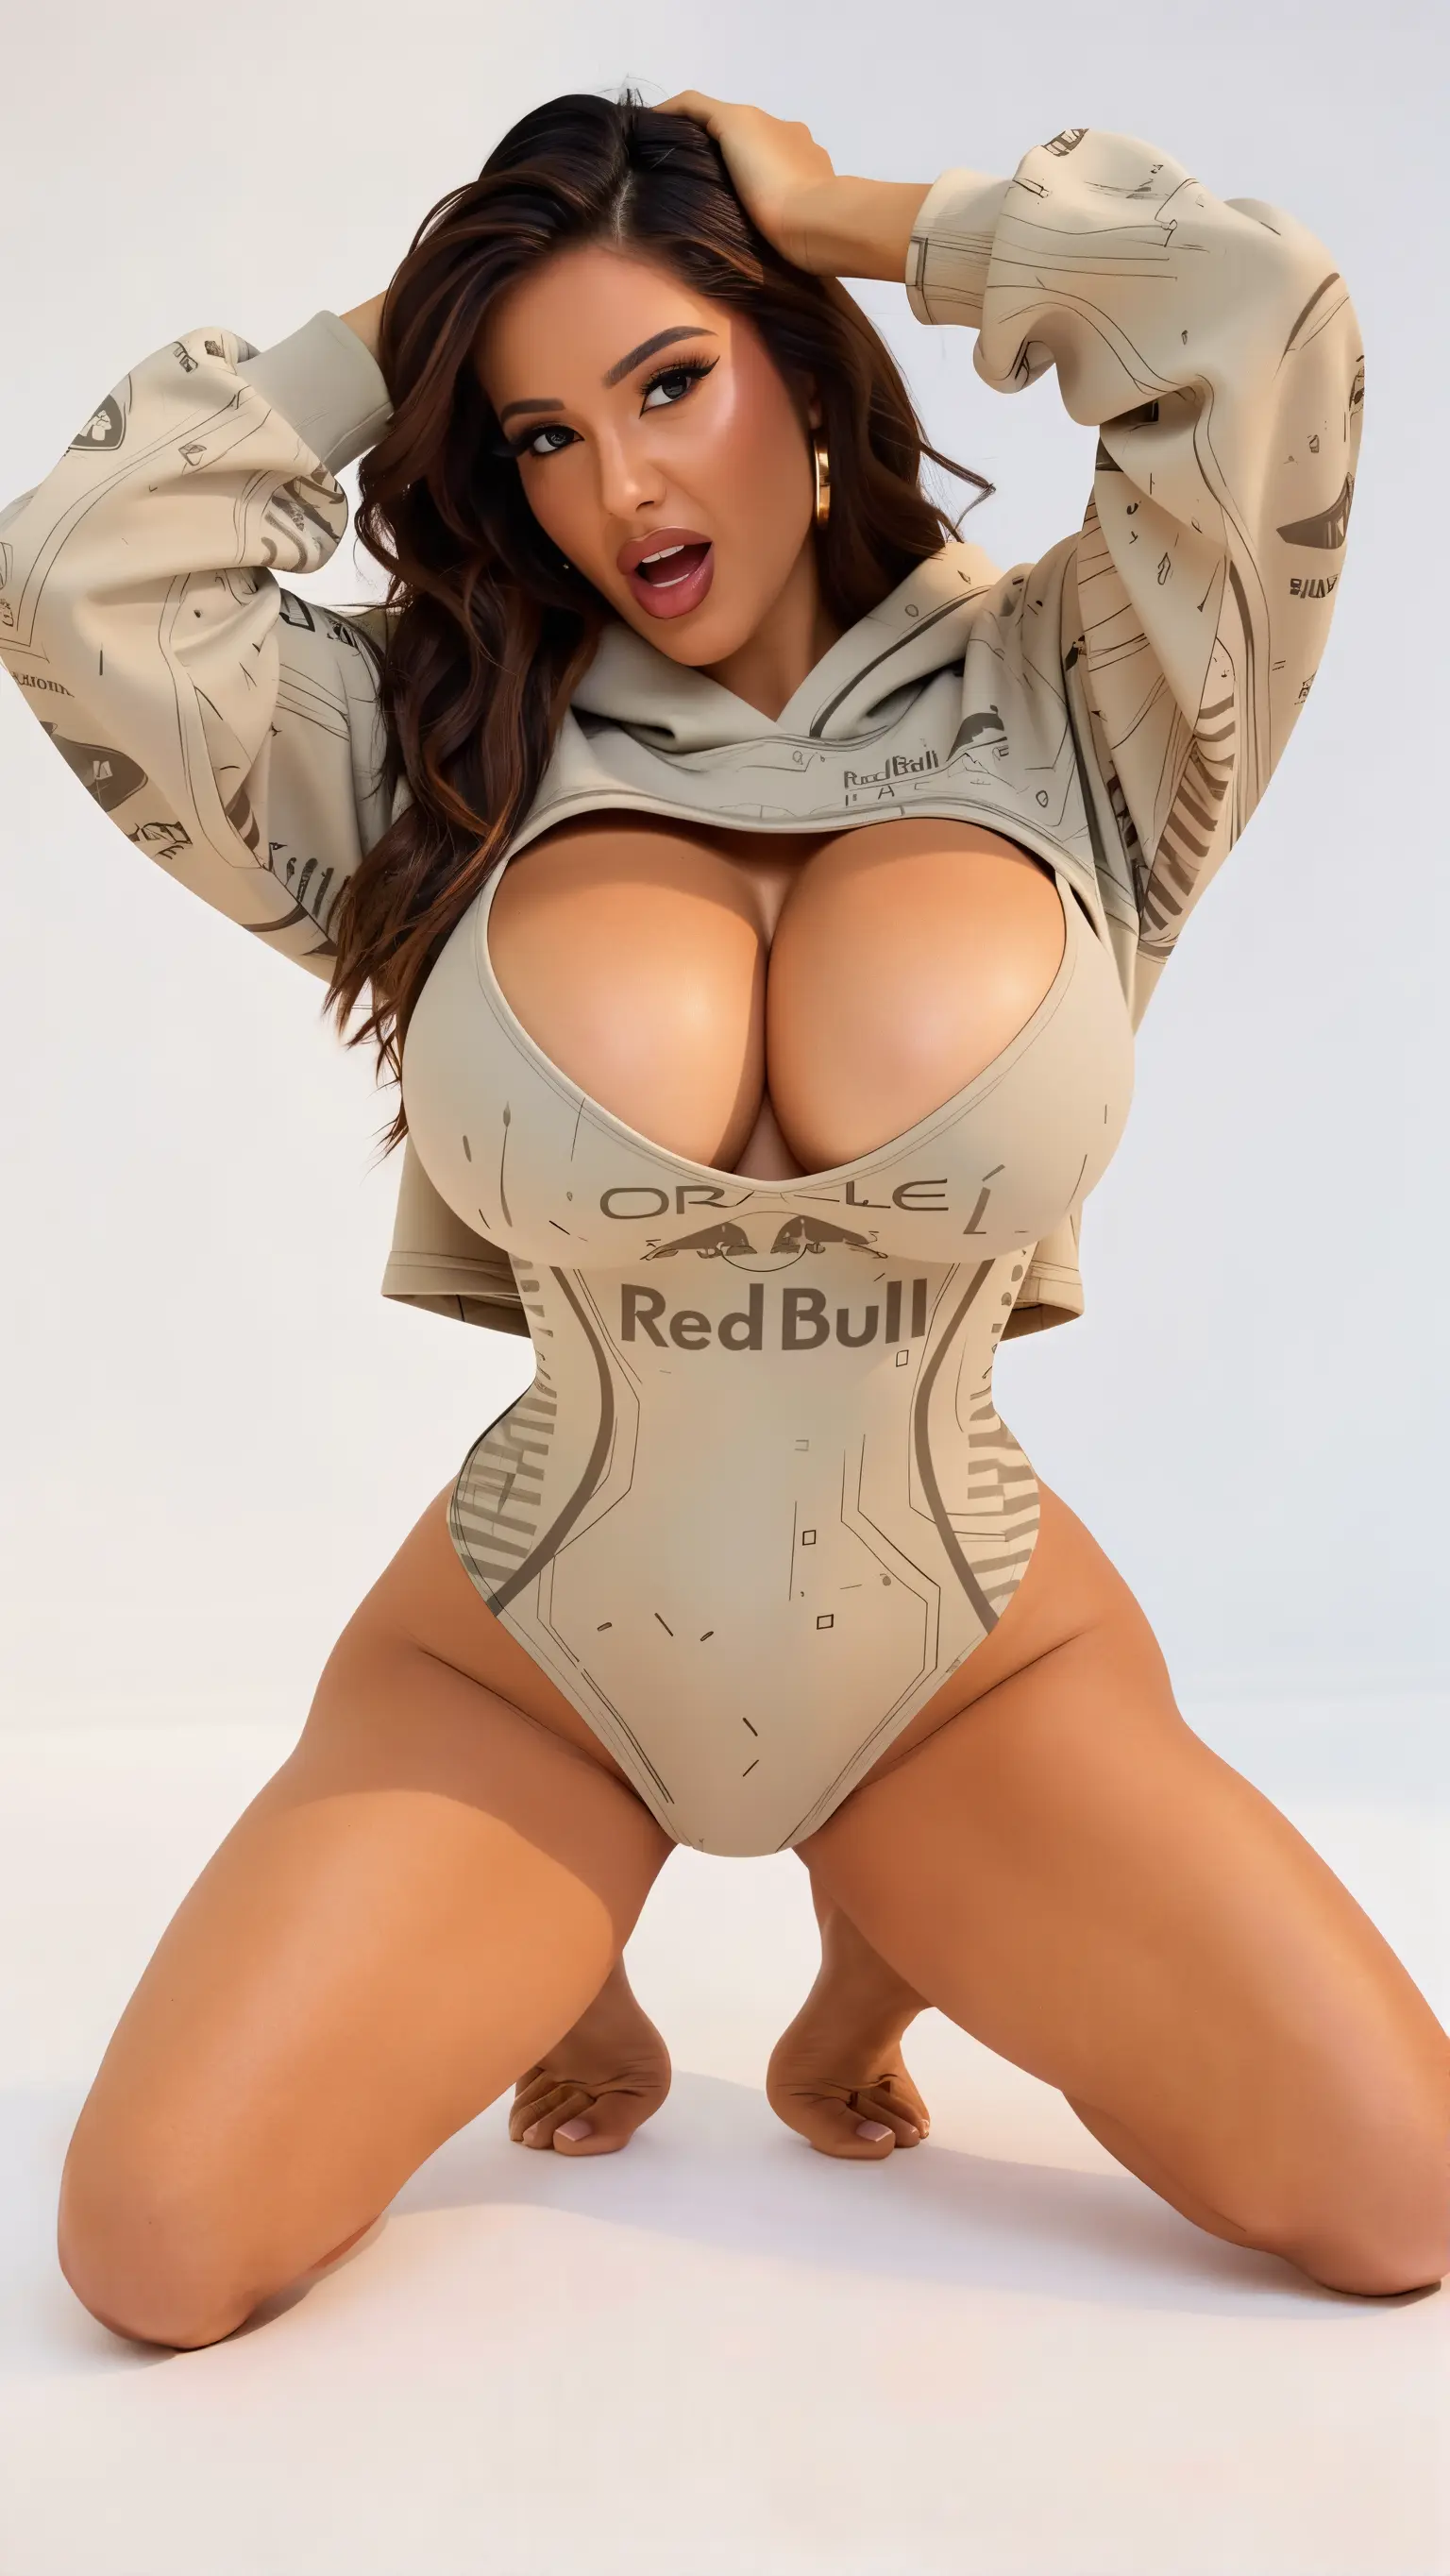
Below are several examples of the clothing swap workflow in action. Each example shows the original person (Image 1), the outfit reference (Image 2), and the final result.
Example 1:
Input Images
Prompt
dress the person in image 1 with everything visible in image 2. carefully identify every single item in image 2 — every garment, top, bottom, dress, swimwear, outerwear, shoes, sandals, boots, hat, bag, sunglasses, earrings, necklace, bracelet, ring and any other accessory or jewellery piece — and transfer each one exactly onto the person in image 1, copying the exact style, color, texture, shape and details. if image 2 contains a bag or handbag, the person must carry it in one hand. replace everything the person in image 1 is currently wearing. if image 2 contains only one item, transfer only that one item. do not add, substitute or invent any item that is not clearly visible in image 2. keep the identity, face, hair, pose and background from image 1 completely unchanged.
dress the person in image 1 with everything visible in image 2. carefully identify every single item in image 2 — every garment, top, bottom, dress, swimwear, outerwear, shoes, sandals, boots, hat, bag, sunglasses, earrings, necklace, bracelet, ring and any other accessory or jewellery piece — and transfer each one exactly onto the person in image 1, copying the exact style, color, texture, shape and details. if image 2 contains a bag or handbag, the person must carry it in one hand. replace everything the person in image 1 is currently wearing. if image 2 contains only one item, transfer only that one item. do not add, substitute or invent any item that is not clearly visible in image 2. keep the identity, face, hair, pose and background from image 1 completely unchanged.
Output
Example 2:
Input Images
Prompt
Change only the clothing of the woman in image 1 to exactly match the clothing in image 2. Do not add, remove, or modify any accessories, jewelry, bags, hats, or shoes unless they are clearly visible in image 2. Keep the face structure, hair, body position, and background completely unchanged. Significantly enlarge her breasts to be huge and very voluptuous with deep prominent cleavage showing. Change her expression to an open sexy orgasm face with eyes open looking forward and sensually parted lips.
Change only the clothing of the woman in image 1 to exactly match the clothing in image 2. Do not add, remove, or modify any accessories, jewelry, bags, hats, or shoes unless they are clearly visible in image 2. Keep the face structure, hair, body position, and background completely unchanged. Significantly enlarge her breasts to be huge and very voluptuous with deep prominent cleavage showing. Change her expression to an open sexy orgasm face with eyes open looking forward and sensually parted lips.
Output
Uncensored Image Editing
Get Started with Uncensored Image Editing in THE HUB
6. Conclusion
The AI Clothing Swap workflow with FLUX.2 Klein 9B in ComfyUI delivers a fast, high-quality pipeline for virtual try-on and outfit transfer without any manual masking or complex preprocessing. By combining two simple image inputs with a natural language instruction, the model intelligently transfers the desired garment while preserving the person's identity, pose, and environment.
The FLUX.2 Klein 9B edit model's 4-step distilled generation ensures quick turnaround times even for demanding high-resolution outputs, making this workflow practical for both individual creative projects and large-scale fashion dataset production. Whether you're building a clothing LoRA, generating e-commerce mockups, or exploring AI-driven fashion visualization, this workflow provides a reliable and flexible foundation.
For best results, experiment with prompt phrasing, try different garment reference images, and adjust the output resolution to suit your target use case.
Frequently Asked Questions
What are the system requirements for using FLUX 2.0 Klein 9B in ComfyUI?
How do I configure the clothing swap workflow in ComfyUI?
What are some tips for achieving better results with the clothing swap?
Enjoyed this article? Share it with your network.